Tutorial
Draw a small decision flow and turn it into a short animated talk, from a blank page. About fifteen minutes.
Part 1: Start a project
-
Open expono
Go to expono.app in a current browser. Chrome and Edge can save a file in place; Safari and Firefox save through a download. Nothing to install and no account.
-
New → Flowchart
Choose File → New → Flowchart. A blank document opens with the Flowchart pack loaded in the Shapes palette, and one act with one scene already waiting in Story.
-
Pick a theme
Format → Themes… opens the Theme Studio. Click a theme to preview it — Helsinki is the clean light one, Berlin its dark counterpart — and Use in document. You can change it at any time; the whole diagram restyles.
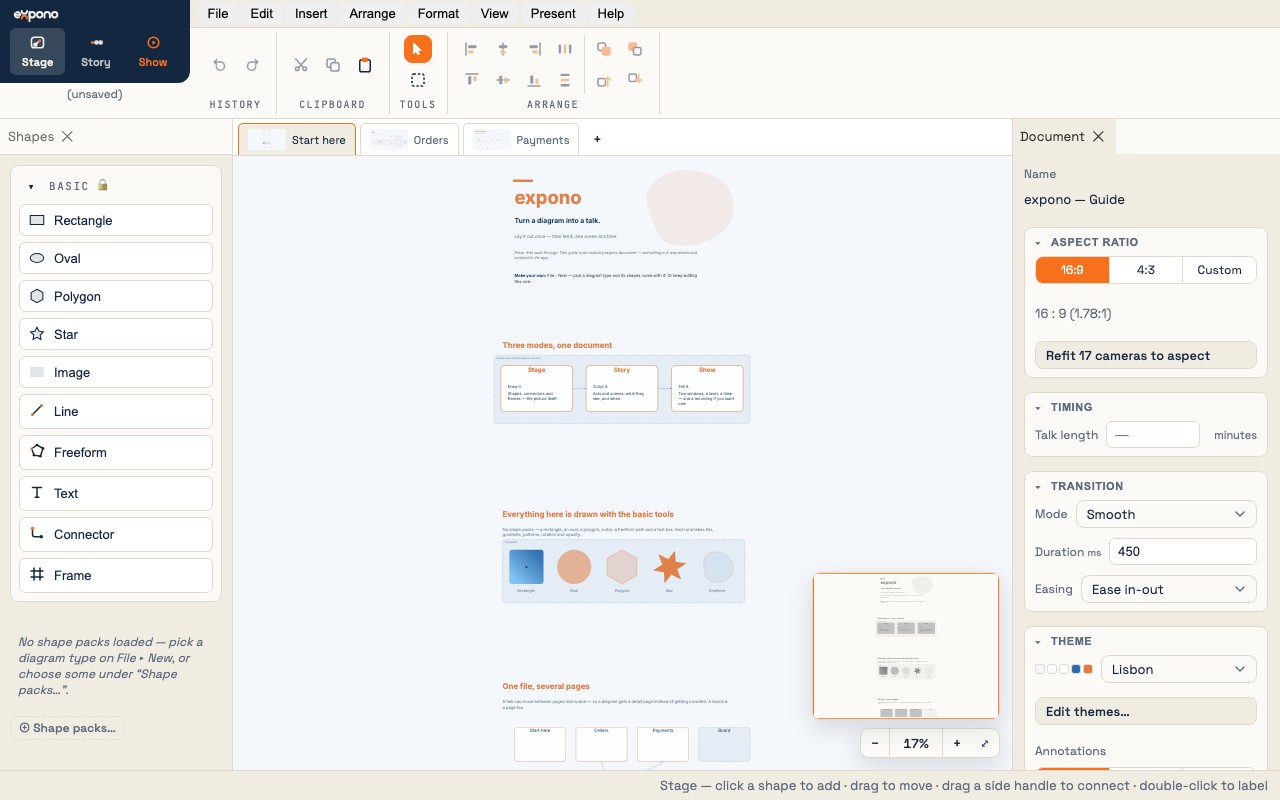
Stage mode — the Shapes palette on the left, the Inspector on the right. -
Save
Press ⌘S. On Chrome and Edge you pick a location once and later saves write in place; the file gets the
.xpdextension.
Part 2: Draw the diagram in Stage
You are in Stage — the mode switch at the top left says so. This is where the diagram is drawn.
-
Place a Start / End
In the Shapes palette, under Flowchart → Basic, click Start / End. It lands in the middle of the canvas, selected. Double-click it and type Customer request.
-
Add a process and a decision
Click Process, then Decision, and drag them below the start. Label them Validate order and In stock? by double-clicking each. A label that runs long wraps, and the shape grows to hold it.
-
Connect them
Hover the start shape: port handles appear on its sides. Drag from the bottom port and drop on Validate order. Repeat from Validate order to In stock?. The connectors route themselves and stay attached when you move things.
-
Two outcomes
Place two more Process shapes: Ship order and Notify out of stock. Connect the diamond's right port to the first and its bottom port to the second. Select each connector and type yes and no in the Inspector's Label field.
-
Frame it (optional)
Press F for the Frame tool and drag a rectangle around everything. Objects whose centers land inside become members; label the frame Order flow.
-
Tidy up
Arrange → Tidy up squares the layout, or select a few shapes with Shift-click and use the Arrange group in the ribbon to align them. ⌘0 fits the whole diagram in view.
Part 3: Script the talk in Story
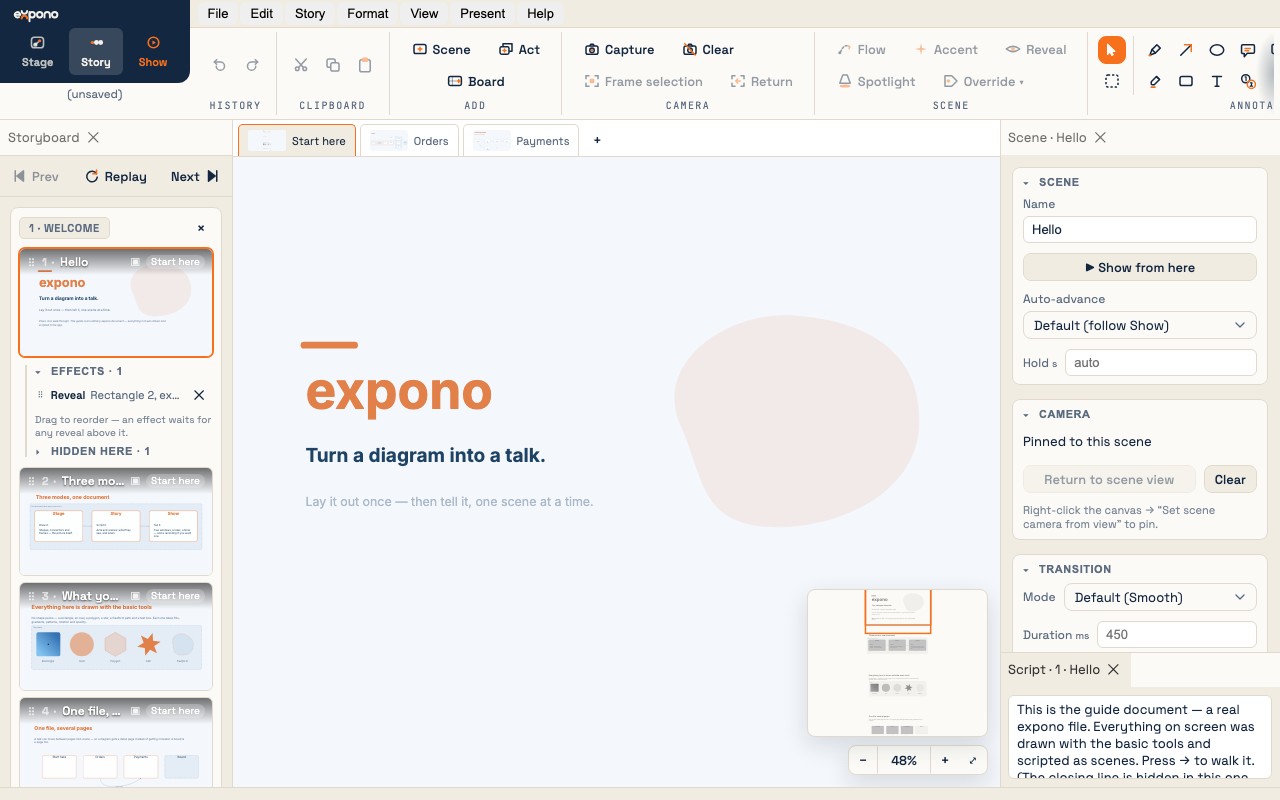
Click Story in the mode switch. The canvas stays where it was; the left panel becomes the Storyboard, and the right side shows the Scene panel and the Script — your speaker notes.
-
Name the act
The Storyboard has Act 1 with one scene in it. Click the act's name and call it Order flow.
-
Script the first scene
Select the scene. In the Scene panel, name it A customer orders; in the Script, write what you will say: “A request comes in from the customer.”
Now decide what the audience sees. Select Validate order and everything below it on the canvas and set them Hidden in the Override panel — the first scene shows only the entry point.
-
Add a flow
Click Flow in the ribbon's Scene group, then click the connector from Customer request down to Validate order. A marker will travel it for as long as the talk sits on this scene.
-
Add scenes
Scene in the ribbon's Add group makes the next one, starting from the current state. Make Validate the order and Check stock, and in each one show one more part of the diagram. To point the camera, zoom and pan the canvas to the framing you want and press Capture; Spotlight dims everything but what you have selected.
-
Walk it
Click through the scenes in the Storyboard and watch the canvas animate from one to the next. Story → Replay animations runs the current scene's entry again.
Part 4: Tell it
-
Start the show
Present → Show from start, or click Show in the mode switch. The window becomes the presenter view: a live mirror of the audience's picture, the scene list, your script and a timer.
-
Open the audience window
Click Open audience view. A clean window opens; drag it to the projector or the second screen and press F for fullscreen. The two windows stay in sync on their own, with no network.
-
Advance
Press → or Space, or a clicker. The transition plays, the next script appears, the timer runs.
-
Come back
Press Esc to leave the show. The editor returns at the scene you stopped on.
Part 5: Leave something behind
File → Export as PDF… from Story writes the talk as a handout — every scene as the audience saw it, with your script beside it. File → Export as image… writes a PNG or SVG of the diagram, or of one scene, for a slide. See Export.